While pondering the creation of a kit car, I came across the issue of getting the car exactly mirrored on both sides. Some people suggested that you get it digitally scanned and then 3D printed. Others suggested buying something that would be malleable, make a mold, then pop it out backwards to make another mold for the negative or inverse or opposite mirrored item. (NIOM mold) (pronounced NEE-AHM)
Of course, I wanted a better way. I came up with a device that would automatically give you the negative/inverse/opposite/mirror image (NIOM) mold, but I will explain here how you can do this at home without a device. This is crafting 101.
What you need:
Please note that this will ONLY give you a rough perpendicular mold.
Depending on the intricacies, you will need either very small rods or wooden dowels, or, if you are working on something big, like a car, large ones. So, for example, we are working on making a mold of a left hand to make a right hand. I would choose wooden sticks with a diameter of 10mm/one centimeter. If you want a lot of detail, you could go even smaller.
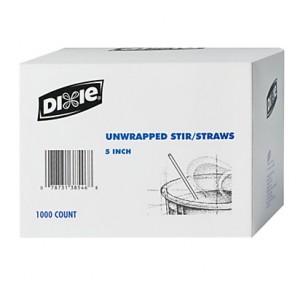
While writing this, I came up with an even cheaper solution. Coffee stirrers. Go to a restaurant supply store (GFS in FL) and pick up a few boxes. 2 boxes will equal one box, because you will want them tightly packed in the box. Use tape to reinforce the box before you shove the contents of the second box into the first. So, now that I have decided on coffee stirrers, I will use that for the rest of this.
You will need a Dremel-type saw. Since this is to go as cheap as possible, you could use a nail file/buffer kit (Sally’s Beauty Supply $40) and a dremel-type blade. Or you could carefully cut through them with an exacto-knife or razor blade, but this would take a long time.
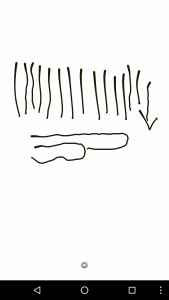
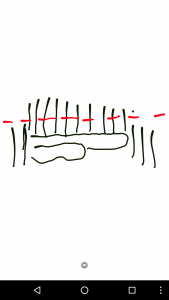
Put your item on a flat surface.
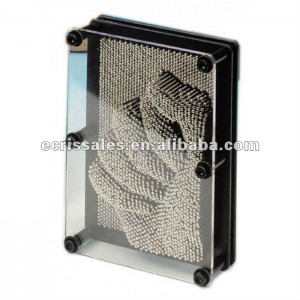
Lower the double-packed coffee stirrers box straight down onto the item to be negatively duplicated. This should look like one of those nail head toys.
Make sure that your stirrers are not bending around the item you are duplicating.
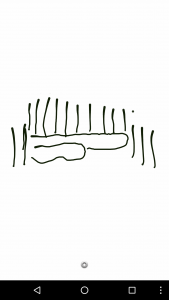
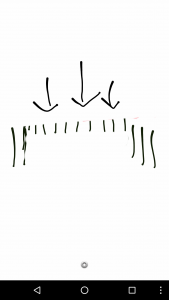
Once you have the mold, you will use the dremel to cut the stirrers flat across the top of the box while the item is still under the stirrers.
Remove the item from underneath the stirrers.
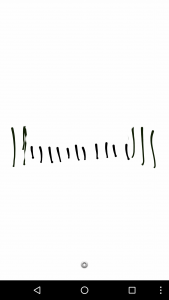
Press all the stirrers down to touch the flat surface and you now have your negative/inverse/opposite/mirror image mold.
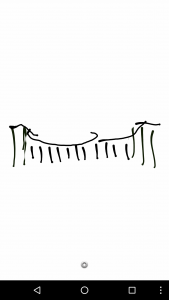
You can then use plaster of Paris or other mold-making stuff to push into the top part of the stirrers and wait for it to dry to have your NIOM mold. From there, your mold release agent should be used as in normal mold-making.
As mentioned before, this will be a very rough NIOM mold and will probably need some detailing, but at least the dimensions will already be there.
The automatic version of this NIOM device I came up with (involving no cutting) may come to fruition if I get some funding or if a company wants to buy the idea.
Hope this helps!
I will try to add more pics soon.